Indeed PAM Gateway
The Indeed PAM Gateway component is installed onto Remote Desktop Session Host server. If there are several RDSH servers, then the Indeed PAM Gateway has to be installed onto each of them.
Switch to C:\Program Files\Indeed PAM\Gateway\ProxyApp folder and edit Pam.Proxy.App.exe.config file:
<pamProxy ... />:
- ApiUrl - URL of Indeed PAM Core
- IdpUrl - URL of Indeed PAM IdP
GatewaySecret - Secret for client keys for additional component authentication
- IdpRequiresHttps - to require secure connection
Leave the rest unchanged
<pamProxy ApiUrl="https://pam.indeed-id.local/api" IdpUrl="https://pam.indeed-id.local/idp" GatewaySecret="OClhdGA1M6wWFcYflCfF1qINX8dYbvTrU0Aad4cb7piASoMEEiB2yM0I8N6zq7T/FSQunLyYzsRcm3PhQzqM9w==" IdpRequiresHttps="true" AgentConnectionTimeout="60" AgentHeartbeatTimeout="20" VideoTempPath="C:\ProgramData\Indeed\Pam\VideoTemp\" FileCopyMaxPercentToIgnore="1" FileCopyEnoughPercentToSave="50" FileCopyMinBytesToSave="1048576" />
<appSettings>...</appSettings>
Edit the "Culture" value to change the user interface language:
  <appSettings>
    <add key="Culture" value="en" />
  </appSettings>
Configuration of session collection
- Log in to the server that performs Remote Desktop Connection Broker role and run Server Manager
- Switch to Remote Desktop Services - Collections
- In the Collections section click Tasks and select the Create session collections item
- Create a collection with parameters you need using the wizard
- Click Tasks in the RemoteApp Programs section and select Publish RemoteApp Programs item
- Click Add, select the C:\Program Files\Indeed PAM\Gateway\ProxyApp\Pam.Proxy.App.exe application, click Next and then Publish
- Open the context menu of the published application in the RemoteApp Programs section and select Edit Properties item
- Switch to Parameters, mark the Allow any command-line parameters option and click ОK
Configuration of access to web applications
Installation of Indeed-Id ESSO Agent/Admin Pack
To access web applications through Indeed PAM, you will need to install additional Indeed-Id components:
- Indeed-Id Admin Pack
- Indeed-Id ESSO Agent
- Browser extensions
Configuring the Internet Explorer extension via group policies
After Indeed-Id ESSO Agent is installed, the extension is automatically added to Internet Explorer, but it is disabled. To enable and configure extension automatically, proceed as follows:
- Run the Group Policy Management snap-in, select the domain, then open the context menu of Group Policy Objects item and click New or use an existing group policy object.
- Switch to Group Policy Objects, open the context menu of an object and click Edit
Switch to
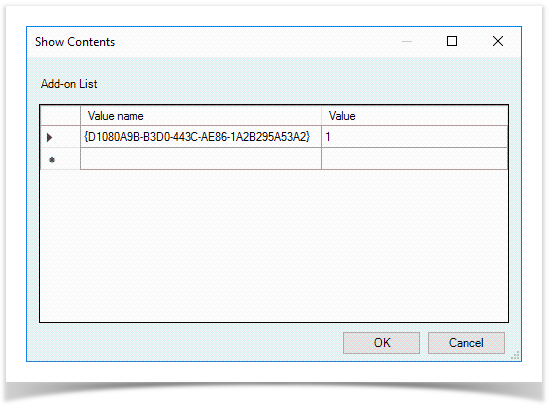
- Open the Add-on List parameter, set the switch to Enabled and click Show in the Options section
- Specify the extension ID {D1080A9B-B3D0-443C-AE86-1A2B295A53A2} in the Value name field. Enter 1 in the Value field and save the changes
Switch to
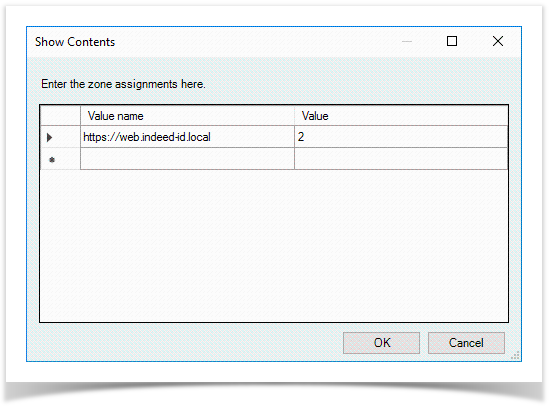
- Open the Site to Zone Assignment List parameter, set the switch to Enabled and click Show in the Options section
- In the Value name field, enter the URL of the host on which the web application is located, in the Value field enter 2 and save the changes
Switch to
- Open the Allow third-party browser extensions parameter, set the switch to Enabled and save the changes
- Open the Turn on Enhanced Protected Mode parameter, set the switch to Disabled and save the changes
- Close the Group Policy Management Editor
- Open the context menu of domain or unit, click Link an Existing GPO, select a group policy object and configure it to work with Indeed PAM Gateway server
- Log in to Indeed PAM Gateway server and run Server Manager
- Switch to Local Server item and open Internet Explorer Enhanced Security Configuration option
- Set the switch to Off for Administrators and Users groups
Configuring the Google Chrome extension via group policies
- Log in to Internet Information Services (IIS) role server, switch to C:\inetpub\wwwroot\ and create a folder named ChromeExtension
- Run Internet Information Services (IIS) Manager and open Sites item in the Connections section
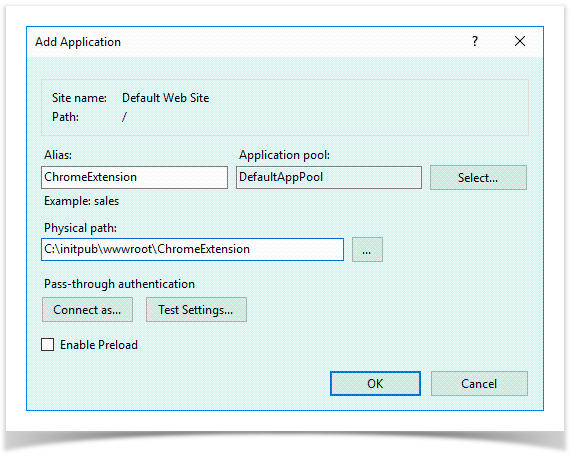
- Open the context menu of Default Web Site or any other site and click Add Application
- Specify ChromeExtension in the Alias field. Enter C:\initpub\wwwroot\ChromeExtension to Physical path field, then save the changes
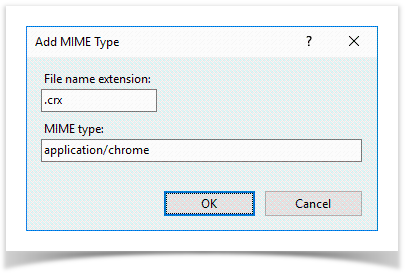
- Select the site where ChromeExtension application is created, open MIME Types item in the IIS section, then click Add in the Actions section
- Specify .crx in the File name extension field. Specify application/chrome in the MIME Type field and save the changes
Send the URL of ChromeExtension application to support@indeed-id.com
- Open the C:\initpub\wwwroot\ChromeExtension folder and place the files received from the support service to it:
- Update.xml
- icpjelgegalmjjkfoilkbeeodgfbcaam.crx
- Install the ADMX templates to domain controller. The templates are included to installation package and located in the IndeedPAM\IESSO\IndeedID.SSO.Agent\Chrome\PolicyTemplates\ADMX
- Run the Group Policy Management snap-in, select the domain, then open the context menu of Group Policy Objects item and click New or use an existing group policy object
- Switch to Group Policy Objects, open the context menu of an object and click Edit
Switch to
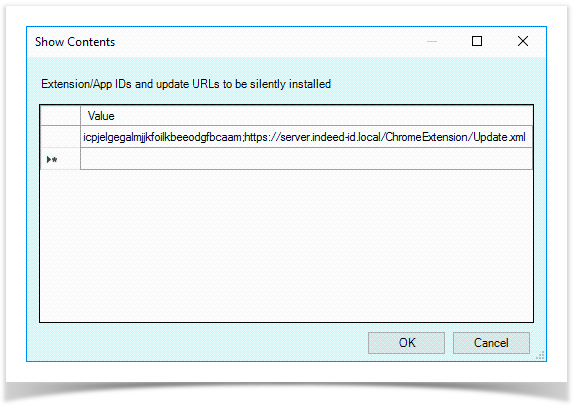
- Open the Configure the list of force-installed apps and extensions, set the switch to Enabled and click Show in the Options section
Specify the ID of icpjelgegalmjjkfoilkbeeodgfbcaam extension in the Value name field, as well as URL of update.xml file and save the changes
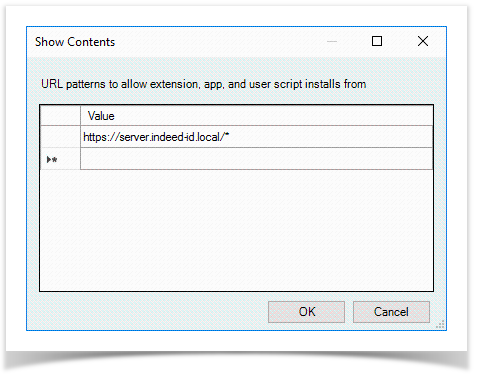
Open the Configure extension, app, and user script install sources, set the switch to Enabled and click Show in the Options section
Specify the URL of the host In the Value name field where ChromeExtension web application is located and save the changes
- Close the Group Policy Management Editor
- Open the context menu of domain or unit, click Link an Existing GPO, select a group policy object and configure it to work with Indeed PAM Gateway server