- Created by Vladislav Fomichev, last modified on Aug 15, 2019
A user should have required access privileges to manage authenticators.
To manage authenticators, open the corresponding tab in the user card.
This tab contains the information on the quantity of registered user authenticators and their parameters.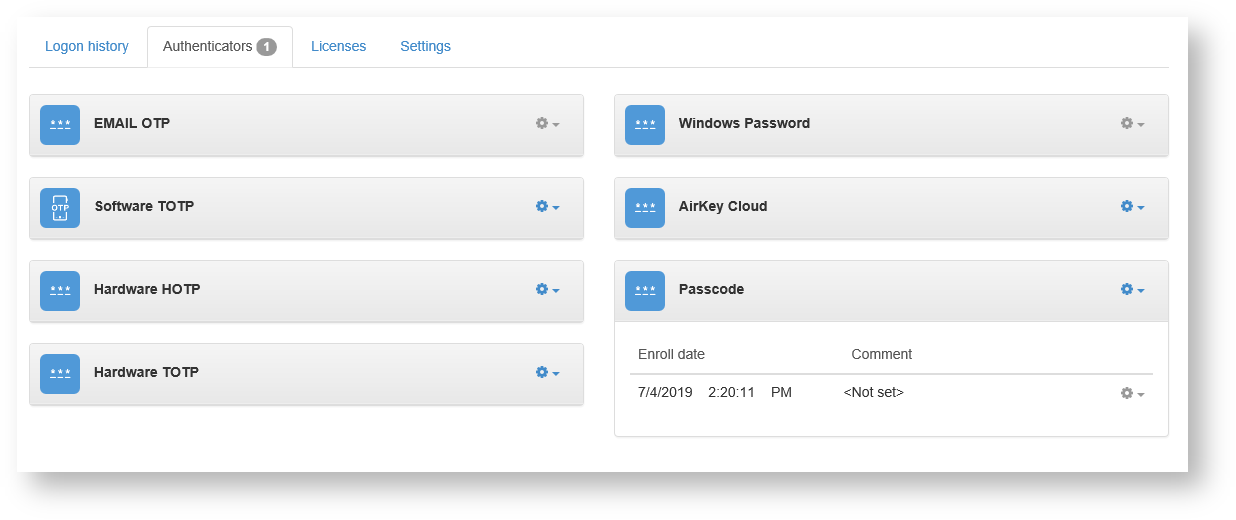
Authenticator deactivation
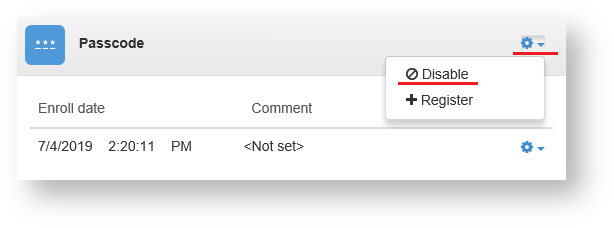
- Select the required authenticator.
- Click the gearwheel icon.
- Select “Deactivate”.
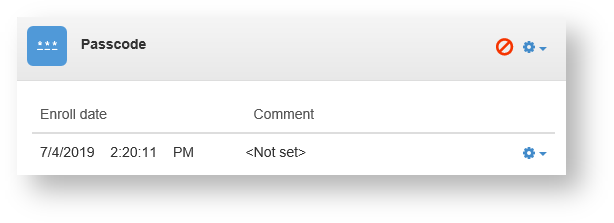
- If authenticator is deactivated, the user cannot use the corresponding authentication method. Deactivated authenticator is marked with red “Prohibited” icon.
Automatic lock and unlock of authenticators
To configure authenticator lock, open "Login method lock” policy (Computer configuration/Policies/Administrative templates/Indeed ID/Server).
The policy applies to Indeed servers. It allows to configure automatic lock / unlock of authenticators.
Not Configured or Disabled
If the policy is not configured or disabled, then authenticators are not locked.
Enabled
Authenticator lock / unlock is performed according to the policy parameters.
Parameters:
- Number of authentication attempts until lock.
The setting specifies the number of unsuccessful authentication attempts until the login method is blocked. The blocked method becomes unavailable until unlocked by administrator or until unlocking timeout expires. If this value is set to 0, then the login method is never blocked.
- Unlock timeout of login method.
The setting specifies the timeout period in minutes the login method is blocked for. When this period expires, the login method is unlocked automatically. If timeout value is set to 0 for a login method, then the method remains locked until unlocked explicitly by administrator.
- Reset locking counter in
The parameter defines the number of minutes that must pass after unsuccessful login attempt before the locking counter is reset to 0. The admissible value range is from 1 to 99,999 minutes. If the number of authentication attempts until blocking is defined, then this reset interval must not exceed the value of "Login method unlocking timeout” parameter.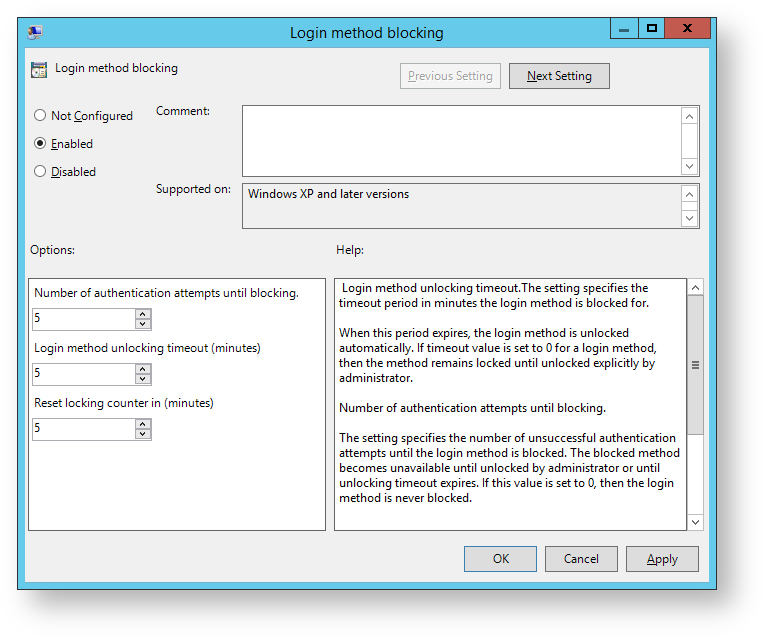
If the authenticator has been locked via group policy, then “Lock” icon is displayed in the right part of the authenticator panel.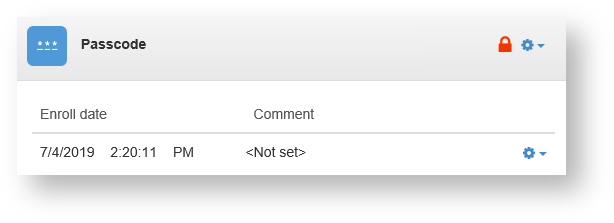
To unlock, proceed as follows:
- Select the required authenticator.
- Click the gearwheel icon.
- Select “Unlock”.
Authenticator registration
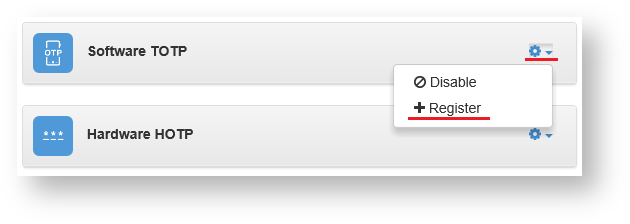
- Select the required authenticator.
- Click the gearwheel icon.
- Click “Register”.
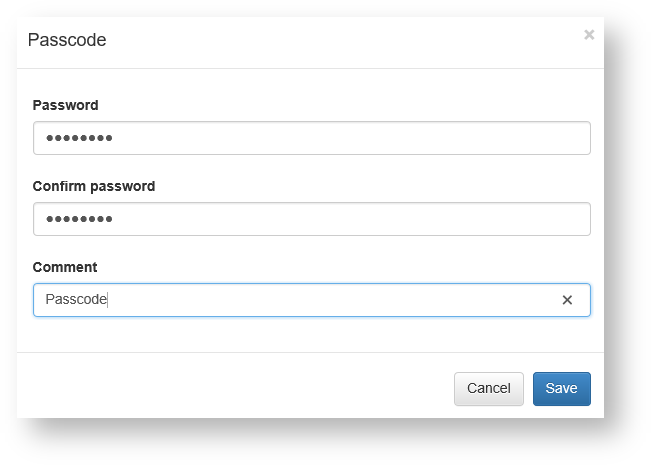
Enter the data for enrollment of selected authenticator and click “Save”.
Windows and actions required for enrollment vary for different authenticators.
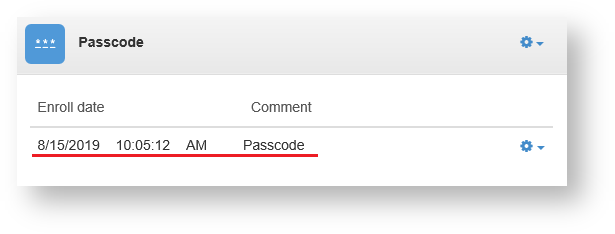
- If registered successfully, the authenticator is displayed as registered.
- “Unavailable” icon is displayed in the right part of the authenticator panel if provider with registered authenticators is removed.
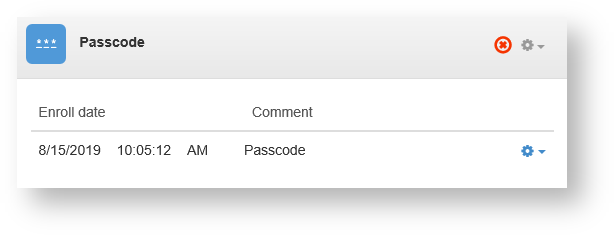
- Email and SMS providers are registered automatically if the user has e-mail address or phone number defined, respectively.
- If the user does not have e-mail address defined after installation of E-mail provider, then the authenticator is not used. “@” icon is displayed in the right part of the authenticator panel.

- If the user does not have phone number defined after installation of SMS provider, then the authenticator is not used. “Receiver” icon is displayed in the right part of the authenticator panel.

- If the user does not have e-mail address defined after installation of E-mail provider, then the authenticator is not used. “@” icon is displayed in the right part of the authenticator panel.
Authenticator modification and removal
- Select the required authenticator.
- Click the gearwheel icon.
- Authenticator modification
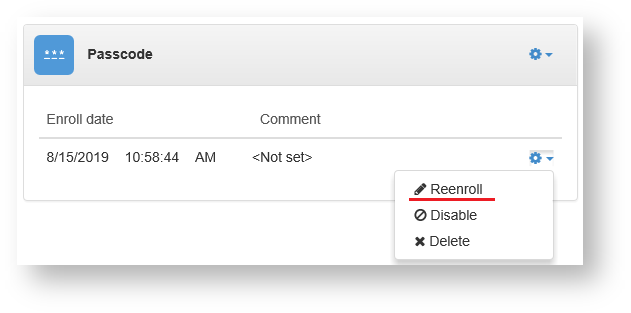
- Select “Reenroll” to modify the authenticator.
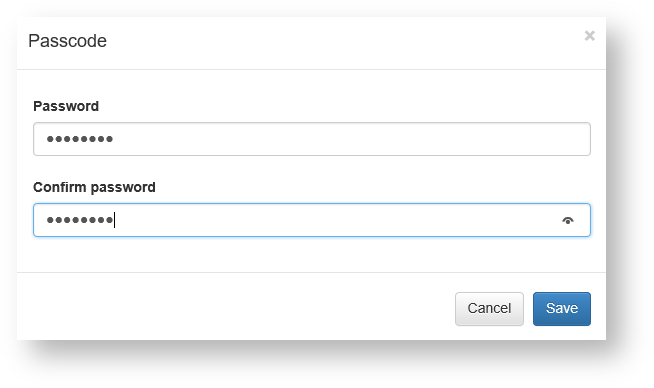
- Enter the new data for the authenticator and click “Save”.
- Select “Reenroll” to modify the authenticator.
- Authenticator removal
- Select “Delete” to remove the authenticator.
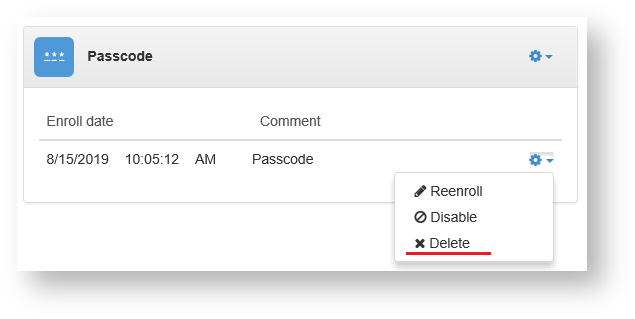
- Click “Delete” in confirmation window.
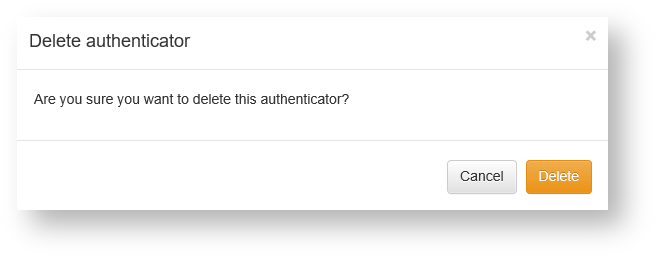
- Select “Delete” to remove the authenticator.
- Authenticator modification

- No labels