The section contains all issued and revoked permissions.
Permission Profile
 The permission profile displays the following data:
- Description - custom text.
- Resources - resources on which RDP, SSH or web-session can be opened on behalf of the account specified in the permission.
- Account - account that is used to open RDP, SSH or web-session on the resources specified in the permission.
- User - Active Directory user for which permission is granted.
- Permission created by - Indeed PAM admin account.
- Permission created at - date and time permission was created.
- Date restriction - dates between which the permit is active.
- Time restriction - time between which the permit is active.
- View account credentials - permission to view the password or SSH key of the access account.
Permissions search
Search is carried out in the Permissions section.
Text search
Enter in the search box in whole or in part # (Permission number), User, Account, Resource or Description.
Extended search
Click Extended search and enter one or more criteria in whole or in part # (Permission number) or Comment, select User, Account or Resource.
Select permission state:
- Valid
- Revoked
Create permission
Permissions give the right to open RDP, SSH or web-sessions. Permission can be issued both from the section Permissions, and form the User, Resource or Account profile.
- Go to the Permissions section and click Create.
Select a user directory.
To search, enter the Name, Surname, Phone number or Email in whole or in part.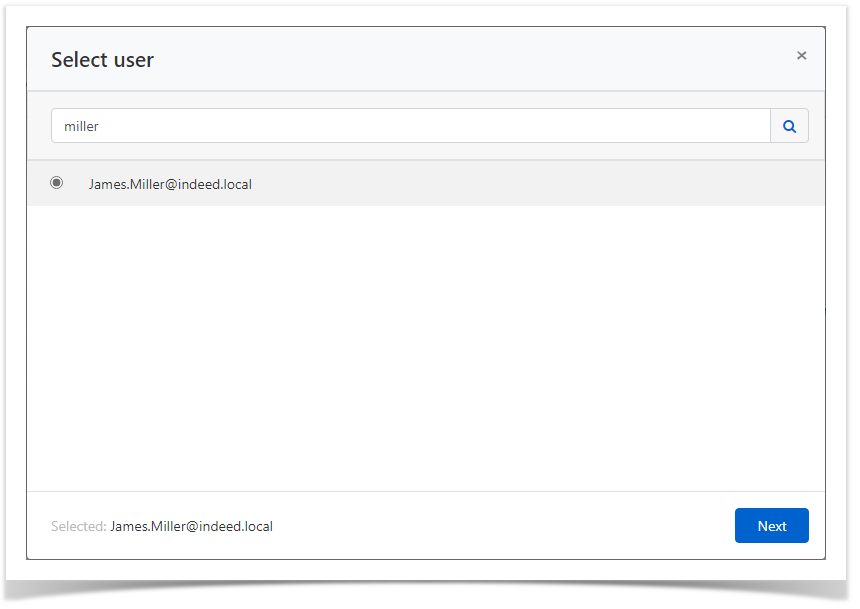
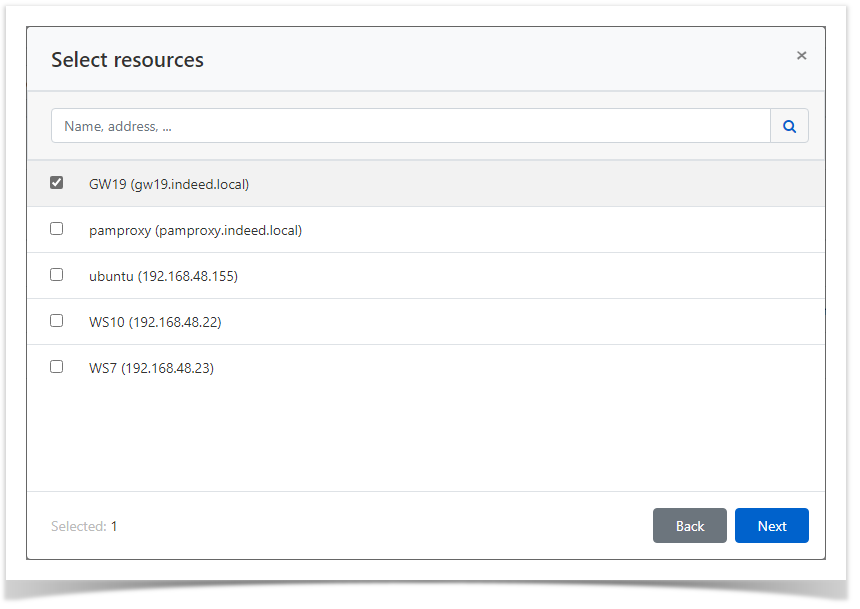
Select resource.
To search, enter the resource Name or Address (DNS address / IP address) in full or in part.Note icon false If more than one resource is selected, then only domain accounts will be used to access them. If one resource is selected, then both local accounts and domain will be used to access it.
- Select an account.
To search, enter the Account Name in whole or in part.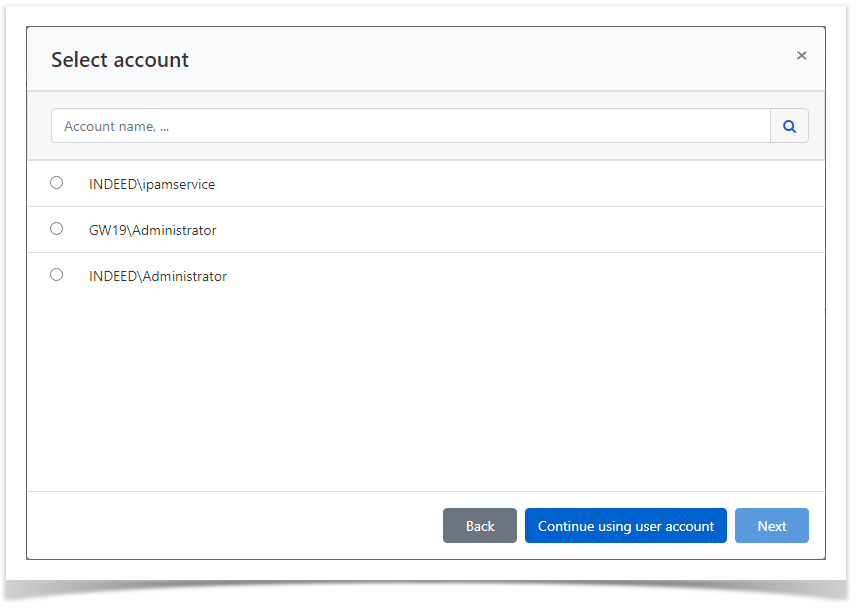
If you select Continue using user account (it will become available if no account is selected), a user account will be used to connect to the resource. In the case of an ssh connection, you will need to enter user authentication data when entering the resource. - Configure Active time:
- Begin - the date and time the permission started.
- End - the date and time the permission expired.
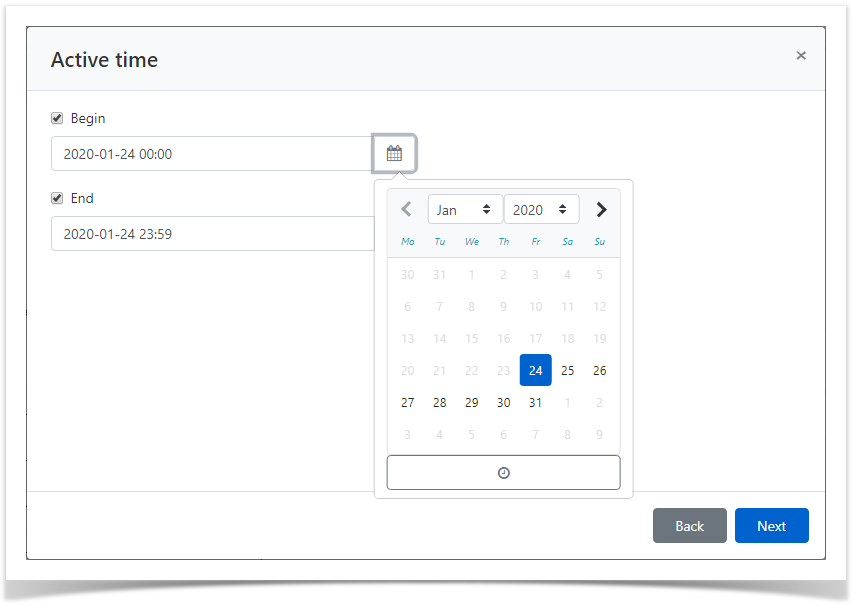
Note icon false Under the calendar, a time selection tool is available. You can also manually enter dates and times.
Configure Access Schedule - access restriction time during the day.
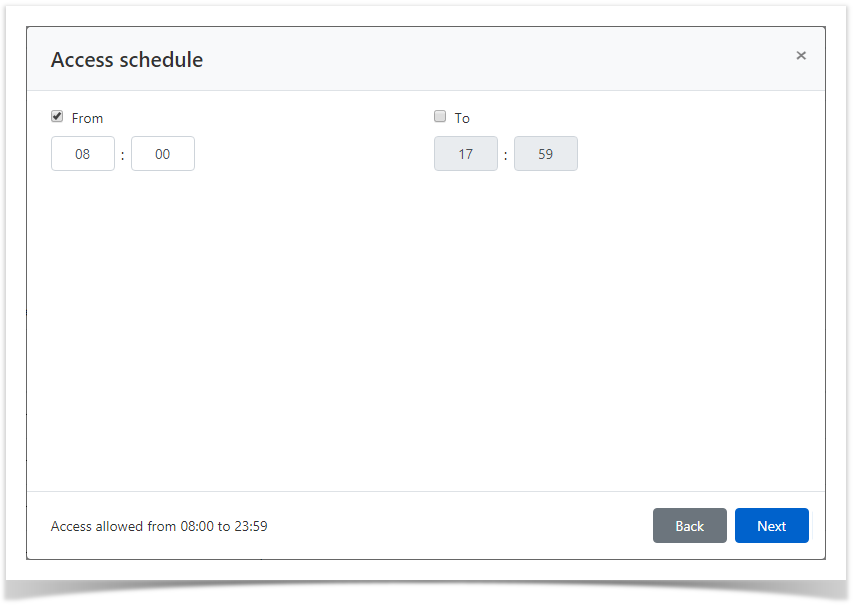
Note icon false If the Active time does not contain the marked parameters, then the resolution will be considered unlimited.
If the Access schedule does not contain the marked parameters, then the permission will be valid around the clock. If the Access schedule is outside the scope of the Active time, then priority is given to the Active time.Configure View account credentials.
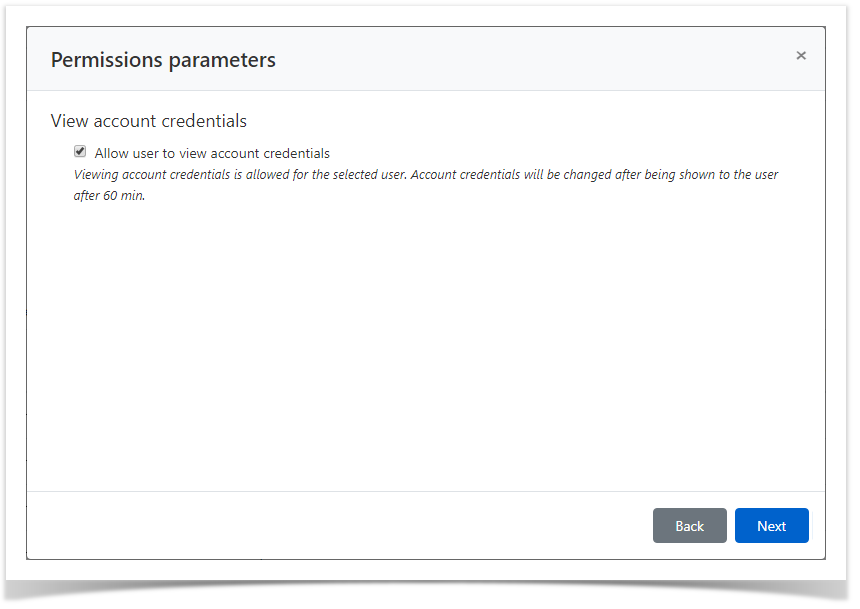
If the user for whom permission is created must have the right to view the password or SSH key of the access account on behalf of which the session will be opened, then check the option Allow user to view account credentials.Tip icon false Viewing account credentials is performed in the Self Service.
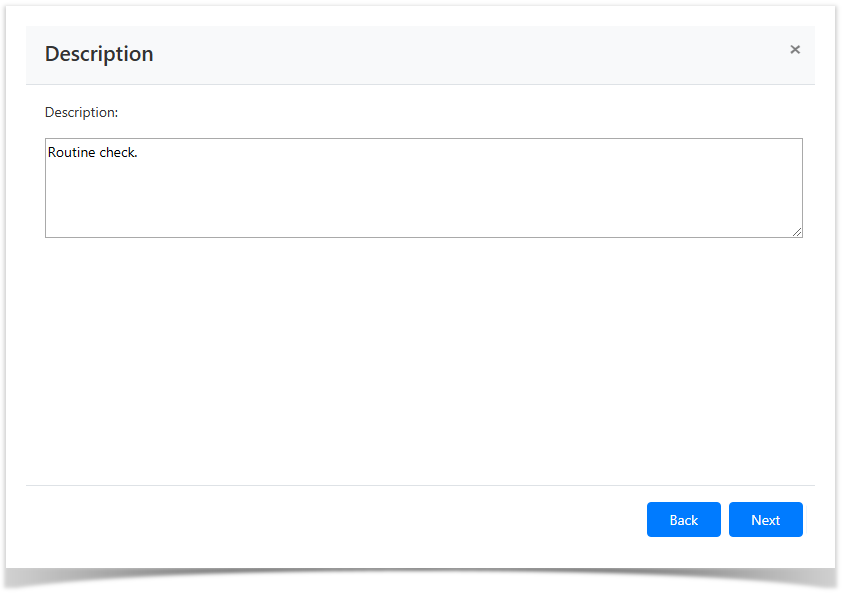
- If necessary, fill out the Description for permission.
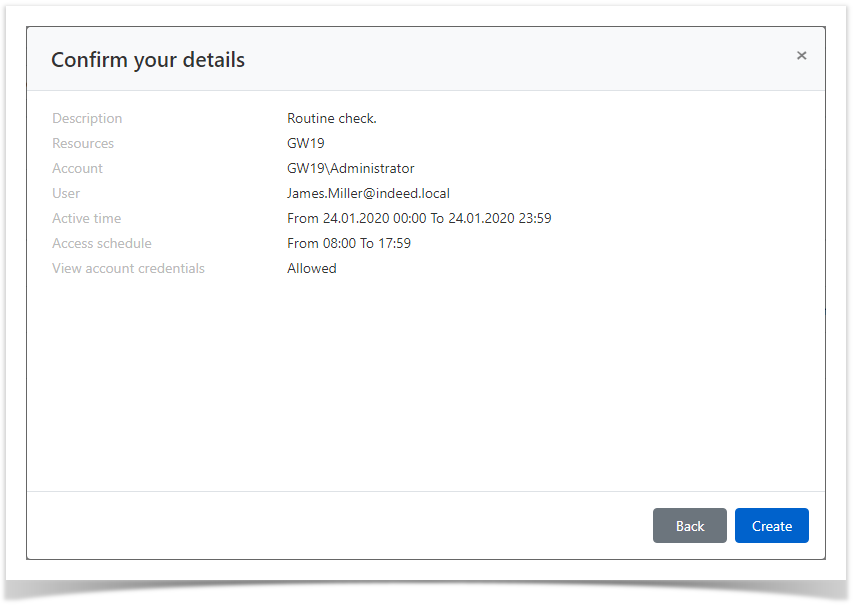
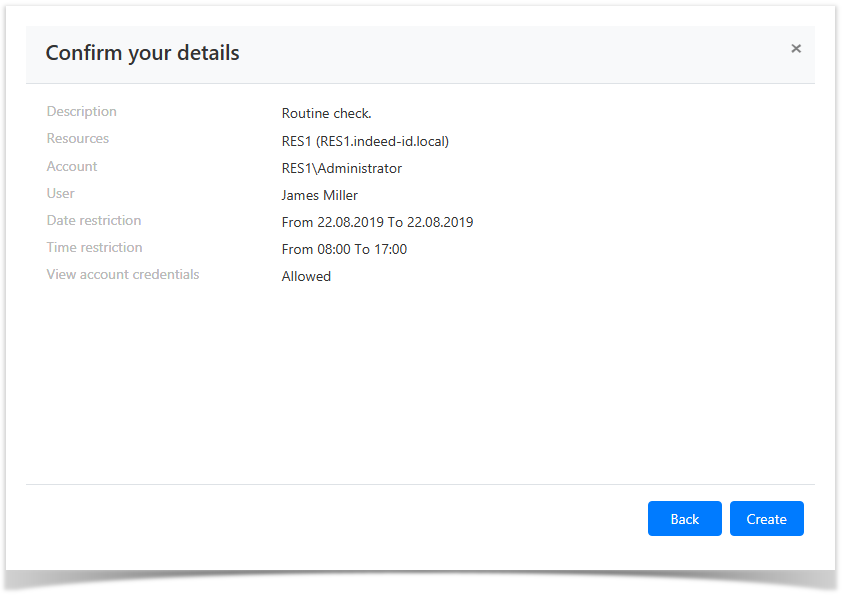
Review the permission details and click Create.
Note icon false If you need to change the permission settings, then you can return to any step by clicking Back.
Revoke of permission
Bulk Revoke of Permissions
- Go to the Permissions section and select one or more permissions.
- Click Revoke, confirm your actions by clicking Revoke.
Revoke of permission from its profile
- Go to the Permissions section and search.
- Open the permission profile and click Revoke.
- Confirm your actions by clicking Revoke.
| Backtotop | ||||
|---|---|---|---|---|
|
| Divbox | ||||
|---|---|---|---|---|
| ||||
|
Раздел содержит все выданные и отозванные разрешения.
Профиль разрешения
Профиль разрешения отображает следующие данные:
- Описание - произвольный текст.
- Ресурсы - ресурсы, на которых может быть открыта RDP, SSH или web-сессия от имени учётной записи указанной в разрешении.
- Учётная запись - учётная запись, которая используется для открытия RDP, SSH или web-сессии на ресурсах указанных в разрешении.
- Пользователь - пользователь каталога Active Directory, для которого выдано разрешение.
- Создал - учётная запись администратора Indeed PAM.
- Создано - дата и время создания разрешения.
- Ограничение по дате - даты в период между, которыми разрешение активно.
- Ограничение по времени - время в период между, которым разрешение активно
- Просмотр учётных данных - разрешение на просмотр пароля или SSH-ключа учётной записи доступа.
Поиск разрешений
Поиск осуществляется в разделе Разрешения.
Текстовый поиск
Введите в строку поиска Номер разрешения, Имя пользователя, Имя учётной записи, Имя ресурса или Описание полностью или частично.
Расширенный поиск
Нажмите Расширенный поиск и введите один или несколько критериев, Номер разрешения или Комментарий полностью или частично, выберите Пользователя, Учётную запись или Ресурс.
Выберите состояние разрешения:
- Действительно
- Отозвано
Создание разрешения
Разрешения дают право на открытие RDP, SSH или web-сессий. Разрешение может быть выдано как из раздела Разрешения, так и из профиля Пользователя, Ресурса или Учётной записи.
Выберите пользователя каталога.
Для поиска введите Имя, Фамилию, Номер телефона или Email полностью или частично.
Выберите ресурс.
Для поиска введите Имя ресурса или Адрес (DNS адрес/IP адрес) полностью или частично.
| Note | ||
|---|---|---|
| ||
Если выбрано более одного ресурса, то для доступа к ним будут использоваться только доменные учётные записи. Если выбран один ресурс, то для доступа к нему будут использоваться как локальные учётные записи, так и доменные. |
Для поиска введите Имя учётной записи полностью или частично.
- День начала - дата начала действия разрешения.
- День окончания - дата окончания действия разрешения.
- Время начала - время начала действия разрешения.
- Время окончания - время окончания действия разрешения.
Отметьте нужные параметры и установите для них значения.
| Note | ||
|---|---|---|
| ||
Если Расписание доступа не содержит отмеченных параметров, то разрешение будет считаться бессрочным и круглосуточным. |
Если пользователь, для которого создаётся разрешение должен иметь право на просмотр пароля или SSH-ключа учётной записи доступа, от имени которой будет открывать сессию, то отметьте опцию Разрешить просмотр учётных данных пользователем.
| Tip | ||
|---|---|---|
| ||
Просмотр учётных данных выполняется в личном кабинете пользователя. |

Ознакомьтесь с деталями разрешения и нажмите Создать.
| Note | ||
|---|---|---|
| ||
Если необходимо изменить параметры разрешения, то вы можете вернуться на любой шаг нажав Назад. |
Отзыв разрешения
Массовый отзыв разрешений
- Перейдите в раздел Разрешения и выберите одно или несколько разрешений.
- Нажмите Отозвать, подтвердите свои действия нажав Отозвать.
Отзыв разрешения из его профиля