...
| Warning | ||
|---|---|---|
| ||
Before you begin the installation, prepare the configuration files. |
- Download and unzip the Indeed Identity PAM archive to the management server.
- Login with Active Directory account and run PowerShell as administrator.
- Run the Indeed-PAM-Wizard.ps1 installation script.
- In the Select components window, check Management Server and click Next.
- In the next step, click Install and wait for the installation to finish.
Click OK in the popup window. - Place the prepared configuration files along the following paths:
- C:\inetpub\wwwroot\pam\core — core
- C:\inetpub\wwwroot\pam\idp — idp
- C:\inetpub\wwwroot\pam\mc\assets\config — mc
- C:\inetpub\wwwroot\pam\uc\assets\config — uc
- C:\inetpub\wwwroot\ls\targetConfigs — ls
C:\inetpub\wwwroot\ls — IndeedIdentityPAM_2.9.0\indeed-pam-windows\ILS\clientApps.config
Warning If you are using a PostgreSQL database, you need to change the Type value from mssql to pgsql in the clientApps.config file in the <Target Id="Pam.DbTarget" Type="mssql"/> line.
- Navigate to the path:
indeed-pam-tools\scripts, run PowerShell as administrator and run the ils-access-list.ps1 script. - Add the CA certificate to your trusted root certificates.
- Add the prepared server certificate to your personal certificate store.
- In the Indeed Identity PAM distribution, navigate to the path:
indeed-pam-windows\MISC\ConfigurationProtectorand run PowerShell as administrator. Run the command:
Code Block language bash .\Pam.Tools.Configuration.Protector.exe generate-signing-cert
- Start Internet Information Services (IIS) Manager.
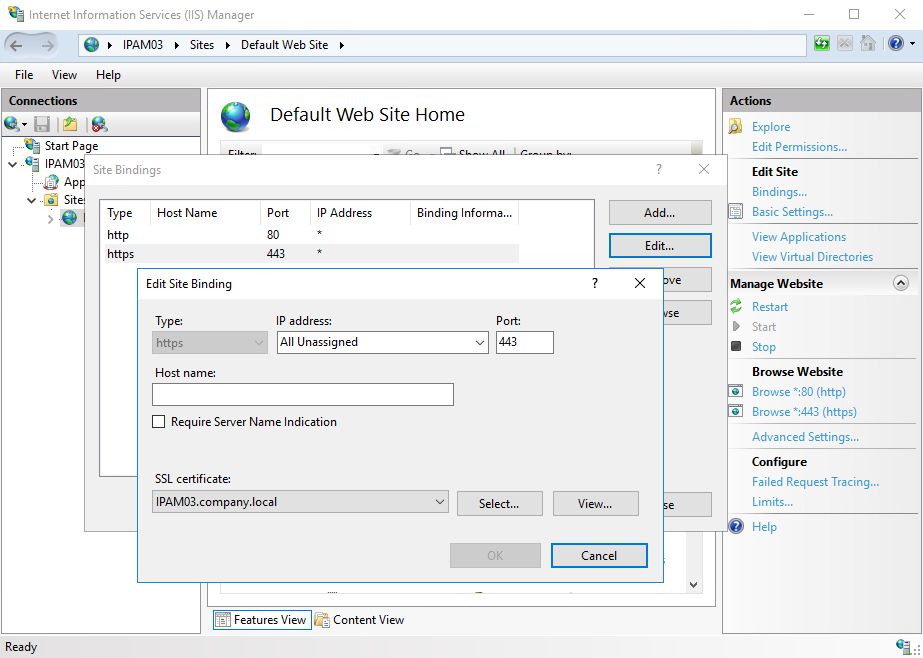
- Select Default Web Site, click Bindings....
- Click Add..., select Type: http, Port: 80, click OK.
- Click Add..., select Type: https, Port: 443, click OK.
- Choose prepared server certificate in SSL certificate, click OK.
- Click to Restart on the Manage Website section in the Default Web Site window.
...
